

As a US Citizen, you will be applying for a Student Visa that allows you to legally stay in Spain for the duration of the 2/3-month TEFL internship. The steps to attaining the Student Visa can feel overwhelming. That’s why we’ve created this handy guide, thanks to Isabelle Wong so you can jet-set off on your adventure to Spain stress-free!
Tip 1: Start the process early.
Getting this visa takes time. Give yourself [as much time as possible] ideally 3-4 months from the start of the process to when you take-off in September!
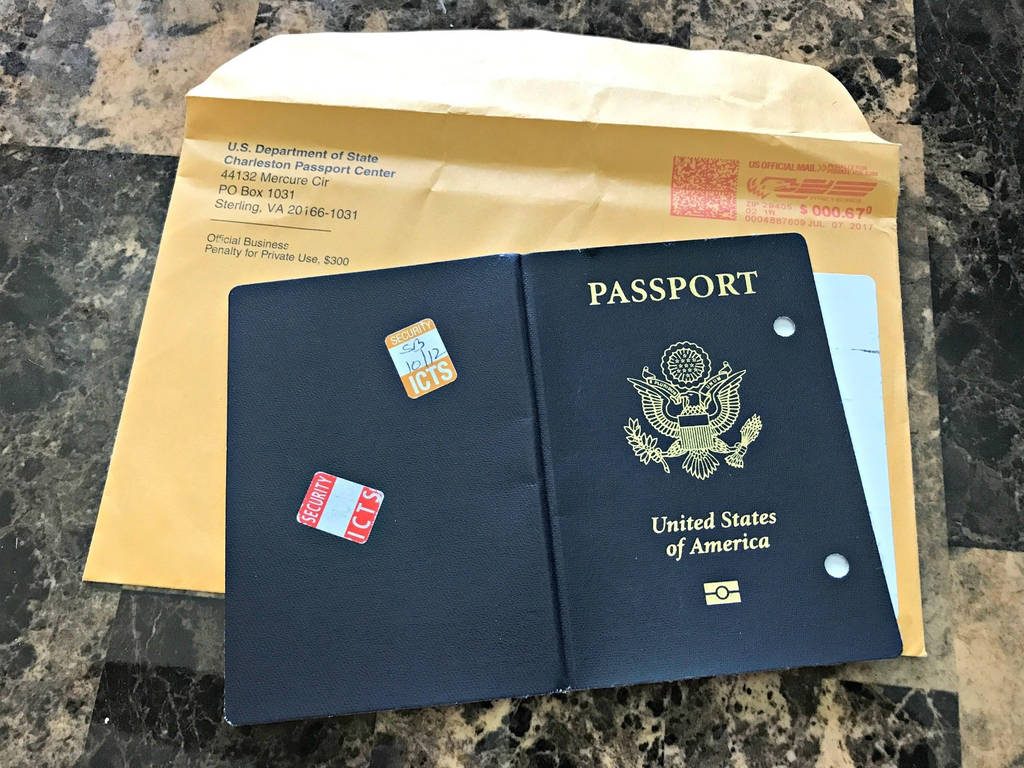
Keep in Mind: Passports must be left at the consulate for processing. Make sure your passport is up-to-date and has at least 5-6 blank pages in it.
Tip 2: Figure out where your Spanish Embassy/Consulate is and book an appointment.
Pro tip: Many Spanish Embassies/Consulates are closed in August. Be sure to book an appointment in either June or early July to allow lots of time for your passport to be sent back to you.
Keep in Mind: You have to appear in-person to your respective Spanish Consulate. This may mean having to book a flight to the location!
Tip 3: Create a check-list.
Print out the list of Visa Requirements from your respective Consulate and check it off as you go. There’s a lot of paperwork involved, so it helps to have somewhere you can keep it all straight. Check and double-check with your Consulate’s website to ensure that you have everything you need when you go for your appointment.
Tip 4: Use a Channeler Service for the FBI Background Check
If you’ve lived in more than one state in the past five years, you will need the FBI Background Check. Although it will cost a bit extra, using an approved FBI Channeler service speeds up the process immensely.
If you’ve lived in only one State for the past five years, then you’ll need a State Background Check. Check with your State Department website to determine where to send your fingerprints for the background check.
Pro-tip: You need to get an official Apostille stamp on your background check. This can take several weeks unless you go through a courier service.
Keep in Mind: You need to have your FBI Background Check and related documents translated into Spanish. Often the courier service you use can recommend a reliable translation service, and you can take care of both at the same time.
Tip 5: Bring everything you need and more to your appointment.
Create copies of every document and multiple copies of your passport. Having more copies is better than missing paperwork!
Tip 6: Hang in there!
Once you arrive in Spain, you have just a couple more steps to complete before receiving your official TIE (Spanish Identity Card for Foreigners). Be sure to bring all of your paperwork to Spain with you, including your official letter of acceptance, health insurance information, and FBI Background Check.

Alright, I’ve read through the tips, and I’m ready to get started. Walk me through the steps!
It’s a lengthy process, but it’s well-worth it for your once-in-a-lifetime experience.

Get the Spain Guide!
Step 1. Check your passport.
Make sure that your passport is valid for at least 6 months past when you finish the program. If you’re finishing the program in June, that means your passport should be valid until at least February. Your passport also needs to have 5-6 blank pages at the back. The Spanish Consulate will attach the temporary visa to one full page of your passport and send it back to you.
Step 2. Go ahead and make copies of your passport now while you’re checking it.
Pro-tip: You will need copies of each page in your passport when you have your follow-up TIE appointments in Spain. It’s always good to have extra copies!
Step 3. Find your respective Spanish Consulate and book an appointment.
Many Spanish Consulates have an online appointment scheduler. Log in as soon as you can to book an appointment as many Consulates are open only in the mornings and are closed in August.
Pro-tip: Try to get an appointment for June or July if possible. If you aren’t able to make an appointment, contact your Consulate directly by phone or email, and check the open appointment scheduler daily as there may be dropouts.
Keep in Mind: if your Spanish Consulate is in a different state, you may have to book a flight!
Step 4. Figure out if you need a state background check or an FBI background check.
If you have lived only in one state in the past five years: State background check.
If you have in more than one state in the past five years: FBI background check.
If you have lived in more than one country in the past five years: FBI background check + background check(s) from the countries you resided in.
State background check: apply for it through your State government.
FBI background check: apply for it through an approved FBI Channeler.
Step 5. Make an appointment at your nearest police station to obtain fingerprints.
Pro-tip: Ask for two copies of your fingerprints! It’s good to have a copy just-in-case your documents get lost in the mail and you need to send them again.
Step 6. Assemble Background Check paperwork and mail it in!
You can request a copy of your State or FBI Background Check electronically on the application form. You will be sent the original background check in the mail, but it’s handy to have the electronic copy as well just in case you have problems with receiving the original background check in the mail.
Pro-tip: While you are at the post office, ask for a pre-paid US Express Mail envelope with your address as the destination address. The Spanish Consulate requests this envelope in order to send your passport back to you after they have processed your visa. Request a tracking number on the envelope too.
Keep in Mind: Check with your FBI Channeler to see if they offer Apostille services. If they do not, you will have to send your Background Check in to the Department of State separately.
Step 7. Call your doctor for the Medical Certificate.
All you need for the Medical Certificate is a letter from a licensed doctor stating that you are free of contagious diseases and able to travel. Be sure to have it notarized.
Step 8. Get your passport photos.
You will need 2 passport photos for the visa application, but you will need another couple of passport photos when applying for the official TIE card when in Spain. Go ahead and get 4 passport photos (against a white background). Check out this website for more information on Visa photo requirements.
Step 9. Print off proof of funds.
This is different for each consulate, so be sure to check what your consulate requires. Proof of funds can in the form of your past two months of bank statements, the bank statement of a family member, or a credit card statement.
Step 10. Fill out the money order.
You can do this at your bank, your nearest grocery store, or a convenience store. The processing fee for the student visa is a non-refundable $160 [correct July 2018].
Step 11. Send your State or FBI Background Check in for the Apostille.
Did you receive your FBI Background Check back in the mail? Great! Now, you have to send it to the Department of State for the Apostille. You can use a service for expedited service (highly recommend), and make sure you send the original copy. It must be on blue tamper-proof paper. Request a tracking number for the envelope so you can trace its progress.
Step 12. Send your State or FBI Background Check in for translation.
You can either mail your background check in for translation or send it in electronically. Consult your FBI Channeler or Apostille service for a reliable translation service. Make sure to have all documents notarized and request copies if possible!
Step 13. Fill out your Student Visa application.
Each consulate has its own Student Visa application. Print it off and fill it out, then make a copy of that application. You’ll need two for your appointment.
Step 14. Assemble all paperwork for your Consulate appointment.
Make sure you have copies of every document. It’s better to be over-prepared than to be missing something!
You will need:
- A valid passport (with at least 5-6 pages blank)
- Copies of each page in your passport
- 2 copies of the Student Visa application
- Form of ID (driver’s license, state ID card, or current student ID)
- Copies of your ID
- 2 passport photos on white background
- Internship Acceptance letter (provided by our Spanish partners)
- Proof of Health Insurance for the time of your stay
- Processing fee of $160 in the form of money order
- Notarized medical certificate
- Proof of funds for the time of your stay
- FBI or State Background Check with Apostille
- Spanish translation of FBI or State Background Check
- Pre-paid US Express Mail envelope with your address
Step 15. Play the waiting game.
The student visa can take anywhere from 4-6 weeks to process, plus the time in the mail. You can expect your student visa back to you about 2 months after your appointment, which is why it’s important to get started ASAP before your departure in September.
It’s a tough process, but hang in there! There are multiple steps to each part of getting the visa, but as long as you stay on top of it (and keep all your documents straight), you’ll have your student visa in hand and ready to go!

Once you have your official TIE card, here are some of the awesome perks you can get!
1. Multiple Entry into Spain
During the 9 months of your internship, you can come and go as you please. Hop on a plane to London for the weekend or take a train to Amsterdam for your Easter holiday – the world is your travel oyster!
2. Access to Student Discounts & Free Entry
Most museums in Europe offer special discounts and free entry for students studying in the E.U. Be sure to take advantage of this awesome deal while you can! Visit the Louvre for free or snatch up tickets for a popular concert for less than half the price.
3. Opportunity to Open a Student Bank Account
Many banks in Spain have fantastic Student Bank Account offers. You can open an account without having to pay a fee and apply for a student bank card, which can include some special deals too.

List of US Consulates:
Massachusetts, New Hampshire, Rhode Island, Vermont and Maine
Illinois, Indiana, Iowa, Kansas, Kentucky, Michigan, Minnesota, Missouri, Nebraska,
North Dakota, Ohio, South Dakota and Wisconsin
Alabama, Arkansas, Louisiana, Mississippi, New Mexico, Oklahoma, Tennessee and
Texas
Southern California (County of Imperial, Inyo, Kern, Los Angeles, Orange, Riverside, San
Bernardino, San Diego, San Luis Obispo, Santa Barbara and Ventura), Arizona,
Colorado or Utah
Florida, Georgia and South Carolina
New York, New Jersey, Connecticut, Pennsylvania and Delaware:
Northern California (excluding the counties of San Luis Obispo, Kern, San Bernardino,
Santa Bárbara, Ventura, Los Angeles, Orange, Riverside, San Diego, and Imperial which
are under the jurisdiction of the Consulate of Spain in Los Angeles), Alaska, Hawaii,
Idaho, Guam, Montana, Nevada, Oregon, Washington and Wyoming
Washington DC, Maryland, Virginia, West Virginia, North Carolina:
Check out a few of Isabelle’s other articles:


